Title of the entry is in Italian, meaning "the fortified backyard of Gela".
In the (very) few accounts I read about the landing and the initial beachhead in Gela (10Jul43), the whole affair has the overtones of a cakewalk. I’m not saying it may have not been one, because compared to the scale and intensity of the events that followed just hours and days later, it may have been easy. But I bet there is no shortage of journalistic and historic research selective memory behind the high availability of material and accounts about all things Patton, 82nd Airborne and Goring Divisions with bare passing mentions about the outright badassery shown by the US Army Rangers and Engineers that cleared Gela.
I am still searching for a good map or aerial reconnaissance picture of the town of Gela, circa 1943. But I will not refrain from throwing together some US and Italian units in an historical fiction type of scenario.
So here is the initial situation for this scenario. After a successful landing, US Army Rangers and engineers are pushing north towards the edges of the town of Gela. As I briefly commented in a previous entry, the northern edge of Gela had a pillbox line and other obstacles for gliders. In this scenario, a company of US Army Rangers has been tasked with clearing that pillbox line. The company has fire support from a 37 mm AT gun, 2 light and 1 medium mortars and the batteries of the USS Savannah. A couple of jeeps and trucks were commandeered from the regular US Army forces still getting ashore.
 |
| Birds eye view of the area of operations. Some Italian engineers were spotted retreating north, after unsuccessfully trying to blow some of Gela's buildings to create roadblocks. |
 |
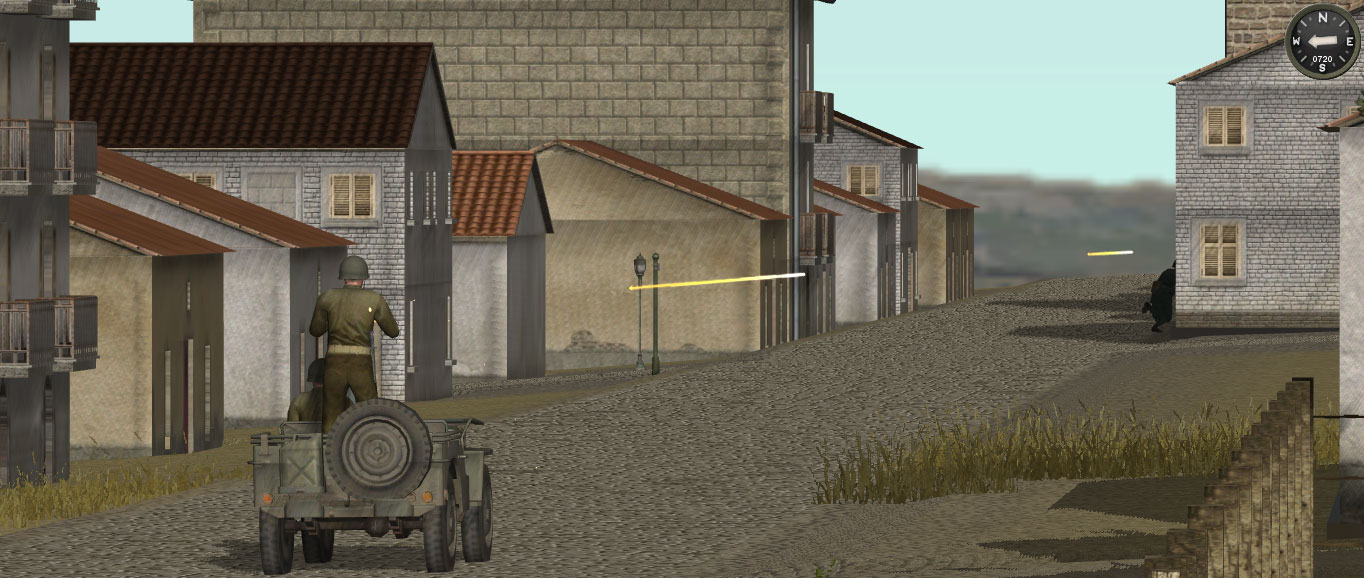
| A couple of patrols were sent to the left flank and they came into contact with the Italian engineers. The Italians shot at these patrols, but continued their movement north. It was decided that it would be too time consuming to catch up with the Italians and that for the rest of the battle a bare flank protection would suffice. In this image, one gunner shoots .30 cal rounds to the retreating Italians. |
 |
| The Company HQ quickly moved to one of the high rise buildings in the center of the area of operations. The view from there was rather alarming, showing a line of mutually supported pillboxes arranged to a moderate depth. |
The plan was to assault line of pillboxes from their rear, sequentially from the east (our right flank) to the west. Suppression of the pillbox line was to be provided by fires from the USS Savannah. The suppression fires from the USS Savannah were to be limited to the the center and west (our left flank) of the pillbox line in order to mitigate the risk of hitting a planned assault position located in our right flank. This fire mission from the USS Savannah is to leave untouched the pillbox on the eastern extreme of our area of operations ("
pillbox east" from now on). Extending the naval fire mission to pillbox east involves too much risk of hitting our own planned assault position. This single pillbox is to be suppressed or knocked out by a combination of fires from a medium mortar and the 37 mm AT gun.
 |
| The medium mortar had to fire at a great rate in order to suppress "pillbox east". The Italian HMG responded and there were some uneasy moments for this mortar crew. However, the combination of mortar rounds hitting the roof of the pillbox and the dust raised by some of the rounds that missed kept the Italian HMG crew suppressed or blind, just enough to allow the AT gun crew to move into position (see below). |
 |
| The 37 mm AT gun is moved into position, right in front of "pillbox east". At the time of this picture, there is a small elevation of terrain protecting the gun crew from fires coming out of the pillbox. But when the gun crew passed through the reverse slope and made into the field of fire of the pillbox, a precise and sustained rate of suppressive fire from the medium mortar was required. Deploying the AT gun took what looked like forever ... |
 |
| The 37 mm AT gun firing against "pillbox east" (background). A combination of HE and canister rounds kept that Italian HMG silent for the most part. |
Having suppressed "pillbox east" with the mortar and the AT gun, the bulk of the Rangers company moved into the assault position, which is in a vineyard at the eastern extreme of the area of operations.
 |
| There was no vino for the Rangers moving through the pauper buildings of this vineyard. |
 |
| Rangers hiding under the vines. By the time of this screenshot, the whole company is in a very small portion of terrain. |
 |
| Waiting for the naval fire mission. The US Rangers are in the vineyard on the right (assault position). Note the AT gun position (green icon at the bottom right corner of the screenshot): it was still firing con gusto at whatever pillbox they could observe. |
Calling fires from the USS Savannah left everybody with a feeling of wasting firepower. The FO team's field of view extends from the center towards the east of the area of operations. They can't observe anything to the left of that street lined with buildings ...
 |
| Complete and utter chaos! The volleys from the USS Savannah land some 30 meters off from where they were plotted. I'm sure the Italians weren't having a great time, but men in our assault position were hit with shrapnel. Some of the squads suffered up to 4 casualties. A fire adjust is requested, but there is no stopping of rounds already in the air. |
 |
| As soon as the last naval round lands, the Rangers picked themselves up and crossed the no-mans land. They needed to get into the rear of the pillbox line before the dust and smoke lifted. |
 |
| The smoke and dust lifted too fast, leaving my Rangers with no option but to stop to engage the Italians. |
 |
| That fire adjustment our FO called for came in while my Rangers were still moving towards the rear of the enemy position (shell burst in the background). Fortunately, this new volley was adjusted to almost millimetric precision. Otherwise, it would have been the worst friendly fire incident in the history of Combat Mission. In this image, a freshly cultivated field offers some concealment and an opportunity to regroup and consolidate fires. Note how the Rangers have now crossed the line of pillboxes and reached the rear of the Italian main positions. |
 |
| Bunker-busting. This one was taken out by one of the few men carrying explosive charges and survived the assault position from hell. This bunker took 2 of such charges to be knocked out. The Italians inside panicked and got out of the pillbox. They were eliminated shortly thereafter. |
 |
| The building behind of the pillbox line was the HQ of the HMG company manning the defenses. This HQ team and many of the Italian engineers that we didn't engage back in Gela were hiding here. An intense and sustained firefight ended with the Italians with their arms up in the air. There are still some Italian engineers on the west side of our area of operations which offered some sporadic resistance. |
 |
| And then the scenario ended. This was very fortunate because my forces were almost out of bunker-busting goodies (only a bazooka and the AT gun left). The morale of the Italians dropped too low and they surrendered completely. |
Cheers,


11 comments:
I love your write ups ... you seem to bring life to games in a way no one else does.
That's very kind of you. Thanks for reading!
This was a great AAR, clearly showing the importance of suppression and combined arms fighting.
Thanks for your comment, Johan. How have you been?
I think it shows the value and the perils of suppression. :) My assault position was way too forward ...
I uploaded this scenario at Battlefront's repository, in case you are interested. I will give you a heads up when it is available (under review right now).
Cheers,
Im doing a PBEM with a guy named Mitra who has a wargame blog. He posts videos of all his battles. If youre interested you can follow the battle here;
http://www.youtube.com/watch?v=b9bHAifxyj0&feature=plcp
Im defending as the germans. The scenario is "Ramparts of the Palokai".
This is schmolywar btw. Couldnt log in normally.
Mind you, he fraps not only the action but him executing the turn as well. There are several turns in one video.
Will he win the hill? Stay tuned!
JC, thanks! I don't have CMFI, waiting for the update with the new features for CMBN instead. But maybe the scenario works with the CMFI demo, I'll definitely have to check that out.
Hi Olav!
Thanks for the heads up.
This is like the crossing of the Rapido River. :) Do you have indirect fire support? I see you have some infantry on your right flank. What is it?
Hi Johan and thanks for your comment. I'm too looking forward to see the new features implemented in CMBN.
Cheers,
JC,
I have plenty of indirect fire support. My 150mm howitzers will be on harass for almot the whole battle.
I think you mean my infantry on the right that was somehow trapped when I set up the bunker. Im unable to move them out of there. Its a game glitch.
Hi Olav,
Save some ammo for that kill zone that will save the battle. Is the river fordable?
Cheers,
The whole river is fordable. However its riddles with mines. As the video series progress you will him struggle somewhat passing it.
No worries, I got about 200 150mm rounds ready for my main killzone once he reaches the strongpoint at the top of the hill!
Do you have anything to counterattack? :)
Post a Comment