Friday, April 30, 2010

The Red Pill Gives You Wings!

Like the famous energy drink ... :)


A new wave of screenshots and a vignette of what The Red Pill can do are now available at WarfareSims.com.

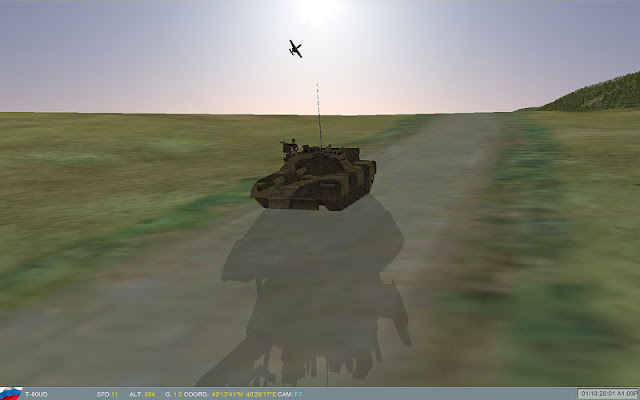
This time, a JSTAR platform flying along the Saudi border finds a group of enemy tanks and an SA-6 battery. A SEAD flight (F-4Gs) and an AI mission (A-10s) take care of them.


There is war gaming goodness wherever you look at! If you read the original post at WarfareSims.com you will notice the extreme detail in the modeling of sensors. There is even mention of secondary explosions taking out some of the SA-6 launchers (!).

I wonder if there is any type of modelling of neutral vehicles. I bet that at that distance the JSTAR may detect Baghdad's rush hour traffic.

Cheers,

Thursday, April 29, 2010

Achtung Panzer Kharkov 1943, New Review at Training and Simulation Journal

This war game keeps getting very good reviews everywhere. Now at both the online and print editions of Training and Simulation Journal, a review by Michael Peck.

The ultimate pass-fail for a tactical game is immersiveness, and that is where “Achtung Panzer” shines above the rest of the tactical RTS pack. Too many tactical games tend to be crowded free-for-alls that demand constant clicking at the expense of decision making. “Achtung Panzer” depicts the loneliness of the modern battlefield, with only a few squads or vehicles in a square kilometer.
The game's weak points (interface and manual) are also mentioned. But overall the review is a thumbs up. Congratulations Graviteam!

Cheers,

Wednesday, April 28, 2010

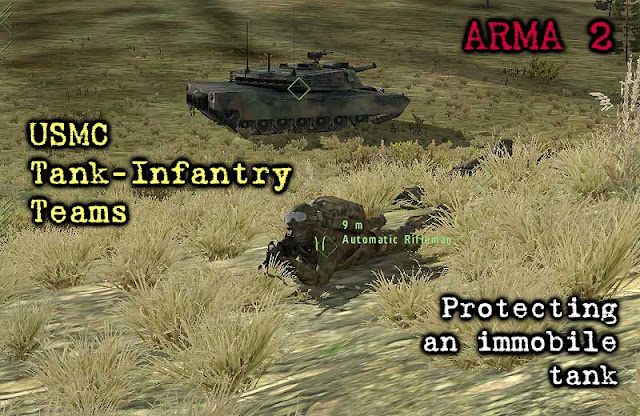
Tank-Infantry Teams in ARMA 2: Protecting an immobile tank (Part 3)

This is a continuation from part 2.

I would like to spend a few words about how I edited this mission. The enemies are Russian infantry squads and AT-13, anti-tank missile teams. I placed one pair of such enemy teams some 2 km away and all around from the immobile tank position. Total of enemy teams pairs was 5. Each pair had a probability of appearance of 35% and a placement radius of 300 meters. Each team has a waypoint directly on the immobile tank and those waypoints get activated by a "Radio Alpha Call" (so I can spend some time setting up my defensive positions).

After setting up our defensive positions I decide to move onto the green fire team position (10 o'clock). As I mentioned in a previous entry, there is a very nice keyhole position there from which I can see all other fire teams.

Waiting for contact is one of the most exciting things in this simulation. Only second to hearing the first shot and trying to figure out where it came from.

An infantry squad spotted at 4 o'clock. Fire team blue (positioned at 6 o'clock and in great high terrain) opens up.

If they are moving, they are toast. That's pretty much how it works in this simulation.

While I was monitoring the fire fight and double checking that all other teams kept their original orientations (you will never know if more infantry could come from other directions), I hear that dreadful "wooooshhhh". The tank was hit but it survived. 

Who fired that? One day I'm going to be hardcore enough to recognize weapon systems by their sound, I swear ...

After two or three minutes the firefight winds down. The enemy apparently will not attack us from other directions. There are still some enemy infantry remaining at 4 o'clock, and they keep coming in and out of sight. 

I grab the green fire team leader and move towards 4 o'clock for a quick look. I am afraid I will have to set up a small patrol to clear that sector of our perimeter. We had to come back in a hurry ...

The AT missile flew directly over our heads and destroyed the immobile tank. We just failed our mission.

And then I did what I should have done all the time "All, suppressive fire". This order works like a charm for those enemy targets that play this diabolical hide and seek game with your fire sectors.

After 6 or 7 minutes, I know that the action has ended. Since we don't have an after action report utility in ARMA 2, I take a stroll to learn about what just happened.

This is the AT-13 team that took out the tank. Our destroyed tank is in the background, 250 meters away.

The enemy infantry squad was caught in the open. The AT-13 team chose a firing position with better concealment, right below the lighthouse.

Lessons learned:
  • My fire plan is barely enough for RPG threats, certainly not enough for AT missiles
  • For protecting an immobile tank in open country, one needs to seriously ponder moving the infantry considerably away from the tank
  • "All, suppressive fire", will shower lead onto enemies that are near the position where they were last seen, even when there is no line of sight to them
  • Would a three man patrol worked?
  • (Your input here ...)
Cheers,


Sunday, April 25, 2010

LOMAC Flaming Cliffs 2.0: Battlefield Air Interdiction at Gudauta (Part 3)

Soon after take off, we get painted by the one of the SA-11s. They should be in the far background.


Navigation. The Caucasus looks all the same from altitude. Rivers played a big role in our navigation.

En route, somewhere between WP2 and WP3. Note the tight space we are in.

At the contact point (CP), waiting for the ground team to contact and clear us. In real life, these CPs may hold you for a long time, so you better trim your aircraft for fuel efficiency.  I checked my fuel consumption and concluded that I could do this for 1.5 hours if needed. CPs around mountains like this may not be a good idea in real life (communications with ground controllers will be a tad difficult).

Once cleared hot, we zoom through the IP. The Death Canyon can be seen here. The SA-11 at the gate of this canyon painted us briefly while we sought refuge on the slopes ahead.

Deep breath nearing WP6. Last glance at ECM, weapons and targeting systems.

The moment of truth. At WP6, we emerge from the mountains and get a panoramic view of the enemy interior lines.

A few seconds later, during our attack run on the SA-11 in the valley (between the urban are and the river). One AGM-65D Maverick launched. No SAMs launched at us, thank goodness ...

This screenshot was made with a replay file, because off course at this point we were breaking hard from our attack run. The SA-11 in the valley goes up in flames.

With the SA-11 in the valley gone, we confidently align for an attack run on the tanks. We get a not-so-friendly reminder form the SA-11 in the coast line about keeping our altitude on check. The missile looses track and self-destructs over the woods.


 We move through the valley with the hills on our right covering us from the other SA-11 in the coast line. Is a tight space, but the A-10 can turn on a dime.

Acquiring targets with low altitude pop ups is challenging and we overshot the tanks during our first pass. They shot at us con gusto, but our serious error didn't have any consequences.

My second AGM-65D finds its target on the first tank. Note how we are breaking too close to the target.

My third AGM-65D misses! Again, we are breaking too close to the enemy.

My fourth AGM-65D. Only one tank left.

I order my wingman to engage the tanks with his missiles, and artificial stupidity kicks in afterburner. He aligns for a text book attack run from high altitude and gets fired at by the SA-11 in the coast line.

No chute, my wingman is dead (explosion in the left).

I then attack the only tank left with all I have at this point, the gun ...

Multiple passes, no results. In this image, a gentle slope made it impossible to put the tank into my sights. Low altitude gun runs suck ...

Another failed gun run with a shallow angle. I just can't pop up because of the SA-11 on my right. Flying over the target is not a good idea either.

I even tried changing the direction of the gun run. After some hits, the T-80 proved to be a tough nut to crack. Now he is getting too close to the front lines. With my guns dry, I RTB.

Landing at the forward base Sukhumi. Not a good day for our wing. A worse night for the troopers on the ground ...

Cheers,

LOMAC Flaming Cliffs 2.0: Battlefield Air Interdiction at Gudauta (Part 2)

Decisions, decisions ... what to do next. The grid lines indicate 20x20 km. Click the image for an expanded view.

The mission is to destroy the enemy tanks before they reach the front line. Resources available: a two aircraft flight of A-10s armed with AGM-65Ds and an special operations team behind the enemy lines.

In the image above the small arrows indicate the likely route the enemy tanks will take: a small valley between the Caucasus mountains and a patch of hills. We will need the assistance of the SOF team to know if and how the tanks are moving. Two SA-11 launchers are already known to be operative: one in the valley and the other one near the coast line. At the front line, the enemy infantry will likely have a good supply of portable IR-guided missiles (MANPADS).

The environment for this mission is moderate to high threat. At least in my experience, the SA-11 is a nasty foe. The two-stage missiles it fires out range our AGM-65Ds by more than a dozen kilometers. The MANPADS threat is no slouch either: silent (you get no instruments warning when they are shoved up to your engines) and many (cheap and easy to transport), I never take any chances against them.

In the image above, the aircraft icons represent different approaches I considered.

"Front Door", is the diddle, diddle, straight up the middle approach. Conscious of my poor piloting skills, I abandoned it quickly because I tend to get too close to any target and the MANPADS would take me out of action rapidly. Also, there is the line of sight issue when one approaches frontally a column of vehicles moving down a road: they tend to have a smaller footprint in my sights and disappear all at once when they move through moderate elevations.

"Slalom" involves popping up from the mountain range, acquire, fire and bug out towards the cover offered by the Caucasus. I called it "slalom" because I tend to spend too much time acquiring, and using this attack approach would have me flying downhill from a starting altitude of 2,000 meters. One would think that in a situation like that the terrain clutter would protect an aircraft from the enemy radars target acquisition systems, but alas the SA-11 is a heck of an air defense that fires a heck of a missile.

Though not undefeatable, the SA-11in the valley complicates things beyond recognition. That SA-11 in the valley ... it needs to be put out of action.

Did you know that you can safely approach an enemy SA-11, without being fired at, if you fly at around 30 feet above the surface level? That trick could be used against the SA-11 in the coast line ("Salty") because flying at very low altitude is easier on water bodies. But that would still leave me with the task of dealing with the other SA-11 and we have only 8 AGM-65Ds in this flight. Suppressing just one SA-11 is all I can stomach right now.

Using the Death Canyon to approach and engage the SA-11 in the valley ("Trench Rat") is just a crazy idea I had. Useless. The SA-11 is just at the gate of the canyon. Where would I break if I get fired? Upwards?

With these ideas in mind my flight plan was born (see way points in the figure above). Way point (WP) 6 is where I will start my attack run on the SA-11 located in the valley. I will pop up above the mountains at WP6. The altitude of the Caucasus there is just 1,300 m (compare that to the 2,000 of "Slalom"). I will then dive onto the SA-11 and destroy it. May my shooting fail, hopefully I will be inside a 3 km ring around this SA-11 (these things can't fire at you if you are closer than 3 km) and with more freedom to asses the situation. WP7 is just an orientation point, I would prefer not to fly through it but rather take the tank targets from a distance.

WP5 is the initial point (IP) far enough from the real attack position. I kept the IP a bit far from where the shooting will happen because if my initial run fails earlier than I can shoot anything, I want to go back to the IP and re asses from the safety of a good covered position. In addition, remember that IPs should be easily recognizable from the air without the aid of instruments. Mountain peaks look the same when you are flying in combat, so I don't use them as IPs.

WP4 is the contact point (CP). This is where I will wait for the ground element to give us a go/no-go.

I chose WP2 at a landmark (where two rivers merge) and WP3 as an intermediate, general orientation WP. Remember, flying the A-10 in combat is more about sensibly using the terrain rather than chasing waypoints. I don't mean to fly straight between WP2 and WP3, and I don't see the need to complicate the flight plan with 25 extra waypoints that will become a chore to manage and follow during the flight.

In that spirit, we fly ...

Cheers,

Wednesday, April 21, 2010

LOMAC Flaming Cliffs 2.0: Battlefield Air Interdiction at Gudauta (Part 1)


Side note: I'm having a hell of a time at work and thus the lack of entries. Thanks for checking the blog anyway, folks. Much appreciated! :)

This is a debrief of a custom-made mission. I suck at geopolitics so I will not even attempt to think about a "big picture" type of background for this mission. The mission portrays the tip of the spear of US Army forces hastily advancing towards Gagra, Abkhazia. Irregular forces, equipped with hardware seized from the Georgian Army, are slowly retreating west and attempting to stand firm at every town they get into. The US westward push has been halted after a US Cavalry troop stops to rearm. Human intelligence (HUMINT) teams behind enemy lines have spotted irregular forces in a civilian truck shop near Gagra getting busy on a platoon of T-80s. These tanks will likely be moved 28 kilometers to the front lines within this hour.

Tactical situation. Note that couple of SA-11 launchers still active after the day of battle.
The day is coming to an end and it is imperative to destroy those tanks before they reach the front lines. After heavy fighting, the only air assets available at this time are a couple of A-10s. A team of special operation forces (SOF) located in the slopes of the Caucasus mountains has a panoramic view of the battlefield can provide fire coordination.

A brief remark on the mission we are to fly. If we would be flying US Army Apaches this mission would be simply called a "spoiling attack". Now that we are flying for the US Air Force, this type of mission would open a hell of a discussion. This is not close air support (CAS) because the enemy T-80s are not in contact with friendly troops (that's what we will try to avoid!). In old times (up to the Gulf War) this mission would be called "battlefield air interdiction" (BAI). But the US Air Force, in all its wisdom has slashed this type of missions from its doctrine and now calls it simply "air interdiction". There is more than wording behind all this. The elimination of BAI from the USAF doctrine has some spins that are more like a soap opera. The US Army/USAF inter service friction at the level of command that deals with funds procurement and doctrine writing is still alive and well.  If the map above would be made up to military standards, a line called "fire support coordination line" (FSCL) would be drawn somewhere west of the "forward line of own troops" (FLOT, the line located west of the US Cavalry troop in the map above). The FSCL is a magic line: in the space between the FLOT the FSCL, the Army commander in the ground has the control of fires coming out from any gun from anybody. Control is the keyword here. Control shapes tactics, tactics shape doctrine and doctrine shapes procurement. Put some clueless senator into the mix and the very future of the aircraft you are flying is at risk.

Enough digression. Let's take a look at the battlefield. The picture below shows the enemy troops disposition as seen from their point of view.


In the foreground, the position of the enemy tanks. These will soon move towards the frontline (in the background of the picture) using the small valley located between the Caucasus mountains (left) and the small hills in the right. The approximate positions of enemy infantry teams are also indicated. Enemy infantry is known to have portable, IR guided missiles. Finally, two SA-11 launchers (one located near the mountains, the other one near the coast) provide a moderate umbrella of defense against air attack. A very dominant terrain feature, the "Death Canyon" is also indicated.


Coming up next: mission planning.


Cheers,

Tuesday, April 13, 2010

VBS2 Lite US Army, Access to Civilians Still in Legal Limbo

According to Bob Dalton and this announcement, VBS2 Lite US Army was to be available to anybody without restrictions. It was later recognized that the EULA contains language that restricts access to non-DoD personnel. A new version of VBS2 Lite US Army, with a corrected EULA was to be released ... still waiting.

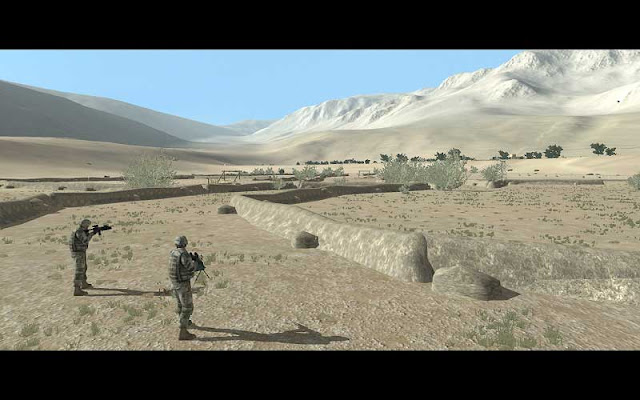
Besides US Army units, VBS2 Lite US Army included an Afghanistan map.

If you know anything about VBS2 Lite US Army, please comment using the link below.

Cheers,

P/S:  Nothing gives me more pleasure than filing this entry under an "ArmA 2" tag. I don't know what the hell is wrong with the overzealous, Spanish-inquisition moderators at Bohemia Interactive forums who continuously shun people for posting about this simulator under excuses of topic (this is not ArmA 2) and now legality (apparently is not legal to even talk about this). It feels good to be both right and in control.

Monday, April 12, 2010

HistWar Les Grognards: Friendly Fog of War Delight

Friendly fog of war (FFoW) is the ultimate challenge for simulations of command. It's not easy to implement and it's not easy to present to the player.

I was playing a quick scenario of HistWar Les Grognards (HWLG) and I thought of showing here how FFoW looks in this war game.

This is good ole 2D map showing the situation of my troops (little squares highlighted blue) at the beginning of the scenario. Of particular interest is the strongest formation in my Army, V Corps commanded by Mortier. Before the start of the scenario, Mortier was ordered to deploy in the center (see figure). He received and understood his orders.

It is now 8:35. Note how I started moving towards the center of the battlefield ("Me" in the figure above). The units that are within my sight are displayed lighter than the ones I can't see. The icons of V Corps have not changed position. Also note the little explosion icons in the center. Some units are fighting there, but since I neither received situation reports from those nor I can see them from my position the only thing displayed is explosions. Some of my reconnaissance detachments have reported the Austrian battle line (squares highlighted white).

8:51 and a lot has changed in the battlefield. Some of my units have updated me on their positions. Not V Corps, who is represented as if it were at the start point. I'm approaching a hill and hopefully that will give me a vantage view of my own troops.

Three minutes later I just reached the top of a hill and now I can see that VCorps has been moving all the time. I just wasn't informed about that.

Mortier and his staff supervising the approach march of V Corps. Merde, Mortier! Drop me a line sometime!

If this doesn't teach me that I have to command from the front, nothing will!

Cheers,

Saturday, April 10, 2010

Tank-Infantry Teams in ARMA 2: Protecting an immobile tank (Part 2)


This is a continuation from Part 1. A stationary tank has to be protected from close assault with RPGs or other AT portable weapons. In this entry, the USMC rifle squad deploys for its mission.

Thursday, April 8, 2010

Across the Dnepr Second Edition

I remember playing for hours with the first edition of this game. Boy this game engine has made some astonishing changes from then!

Across the Dnepr Second Edition is an add-on for Kharkov Disaster in the Donets. This second edition of Across the Dnepr uses all the tricks of SSG's new game engine.

One thing that immediately hooked me in this second edition is how the mobility of motorized/armored groups has been improved. Now I'm able to use my reconnaissance units deep into enemy territory.

The 10th Panzer Division (10PzD, blue icons with the "Y" yellow symbols) and the 4th Panzer Division (4PzD, blue icons with the inverted Y white symbols) approach Mogilev from the north and the south respectively. Note how the reconnaissance battalions have successfully bypassed the Russsian infantry (light brown counters).

Just because SSG cares about old farts like me,  the magnifying glass will never be dropped from their games. Ever. On a serious note, the reconnaissance party has bumped into the Russians. Time to call the tanks up.

The 4PzD is running circles around the Russian infantry. 

I'm going to review this game sometime in the near future (the backlog of reviews is not getting any smaller, yikes!).

Cheers,

Achtung Panzer Kharkov 1943: Get Off that Road!

I'm enjoying the relatively slow pace of WWII tank battles in Achtung Panzer Kharkov 1943 (APK43). Compared to the fast and furious pace of modern armor combat (as shown in Steel Beasts ProPE), in APK43 I have a chance to screw it and fix it. Sometimes it's hard not to be overconfident and forget "good manners".

In one instance I was moving a German tank platoon down a road. There was a small patch of woods ahead and as soon as the point tank emerged from the tree line it was welcomed by a well placed Russian AT gun.

AT ambush, 10 meters ahead.

Take a look at the figure below, taken from the "Training Directives for the Light and Medium Tank Companies, March 1939".

The square inside a circle represents a tank and the other symbol an AT gun (you may recognize from APK43). Left side (wrong), the tank at the edge of the trees gets nailed by an AT gun. Right side (correct), the tank steps aside the road and spots the AT gun from the cover of the foliage.


Put those trees to work for you. Russian AT gunners don't have IR imaging. A German tank takes a peek at the open terrain ahead from the concealment offered by the trees.

Cheers,

Tuesday, April 6, 2010

LOMAC Flaming Cliffs 2.0: Grooming All My Cockpit Vices

Ideally, a pilot should have some visual routines (when and where to look at) that became so ingrained into him he doesn't need to think about them. Checking the "six pack" is one of those.

With DCS A-10 in the horizon, I'm trying to learn as much as I can about the A-10 by flying it in LOMAC Flaming Cliffs 2.0 (FC2). Alas, I'm finding out that besides learning, I have to get rid of many vices/habits. The operation of the A-10 in FC2 is quite simplified and I wonder what's going to be of me when I sit my butt in the detailed virtual cockpit of DCS A-10. :)

Anyway, let's talk a bit about weapons delivery, specifically the AGM-65D. For the time being let's forget about low-high/high-low tactical approaches to the target area. I edited a mission just for practice: a couple of Shilkas near a bridge. I will just fly high out of their reach and try to find and destroy them.

The visual routine for finding the target, locking and firing an AGM-65 is quite different than what I thought. I am supposed to spend most of the time looking out, not staring at the TV monitor to the right. Ideally, acquire the target visually, ground stabilize the EO-aiming reticle near the target and make final adjustments by looking at the TV monitor. In this case I couldn't acquire the Shilkas visually, so I just ground stabilized the EO-aiming reticle in the general target area and made the final adjustments with the TV monitor.

Look up more. Note the tiny little white speckles in the cross-hairs of the TV monitor. Two Shilkas are about to be bagged.

The problem with fixing one's attention in the TV monitor while flying into a hot area is that one develops tunnel vision, looses situational awareness to threats, tends to fly straight (a sure treat for AAA gunners) and (in severe cases) stops flying.

 During night missions, you have an extra enemy: the lack of external visual cues. The temptation of using the IR seeker of the AGM-65D as a FLIR is just too much.

Survivor to all the surrounding destruction, a Shilka takes aim at our flight.

Gah! In top of all this crap I'm supposed to perform approach tactics ...

Cheers,

Sunday, April 4, 2010

Scourge of War: A Good and Extended Fire Line Is Just a Click Away

Well, compared to Take Command 2nd Manassas (TC2M) there is new stuff in Scourge of War. Beyond the graphics haul, that is.

Take a look at the screenshots below (taken from "Sandbox" mode of play).

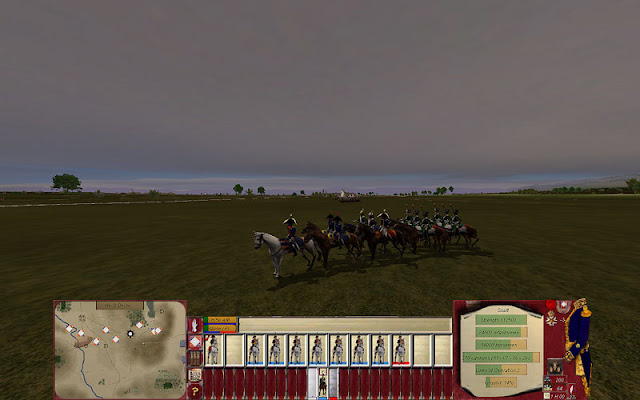
The regiment in the foreground (97th New York) can't shoot to the rebels because is blocked by another federal regiment. In TC2M, to put the 97th New York into a good firing position one would need to move the regiment in column formation to a new firing position. That was cumbersome.

There is a new command in Scourge of War: lateral move. Just one click and the regiment will move to the right or left without loosing their line formation. Much better! Note how some trees have lost their foliage.

There is no doubt that from certain angles, Scourge of War looks great.
Cheers,