Soon after take off, we get painted by the one of the SA-11s. They should be in the far background.
Navigation. The Caucasus looks all the same from altitude. Rivers played a big role in our navigation.
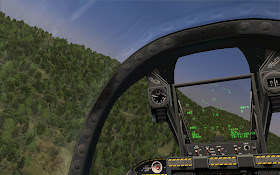
En route, somewhere between WP2 and WP3. Note the tight space we are in.
At the contact point (CP), waiting for the ground team to contact and clear us. In real life, these CPs may hold you for a long time, so you better trim your aircraft for fuel efficiency. I checked my fuel consumption and concluded that I could do this for 1.5 hours if needed. CPs around mountains like this may not be a good idea in real life (communications with ground controllers will be a tad difficult).
Once cleared hot, we zoom through the IP. The Death Canyon can be seen here. The SA-11 at the gate of this canyon painted us briefly while we sought refuge on the slopes ahead.
Deep breath nearing WP6. Last glance at ECM, weapons and targeting systems.
The moment of truth. At WP6, we emerge from the mountains and get a panoramic view of the enemy interior lines.
A few seconds later, during our attack run on the SA-11 in the valley (between the urban are and the river). One AGM-65D Maverick launched. No SAMs launched at us, thank goodness ...
This screenshot was made with a replay file, because off course at this point we were breaking hard from our attack run. The SA-11 in the valley goes up in flames.
With the SA-11 in the valley gone, we confidently align for an attack run on the tanks. We get a not-so-friendly reminder form the SA-11 in the coast line about keeping our altitude on check. The missile looses track and self-destructs over the woods.
We move through the valley with the hills on our right covering us from the other SA-11 in the coast line. Is a tight space, but the A-10 can turn on a dime.
Acquiring targets with low altitude pop ups is challenging and we overshot the tanks during our first pass. They shot at us con gusto, but our serious error didn't have any consequences.
My second AGM-65D finds its target on the first tank. Note how we are breaking too close to the target.
My third AGM-65D misses! Again, we are breaking too close to the enemy.
My fourth AGM-65D. Only one tank left.
I order my wingman to engage the tanks with his missiles, and artificial stupidity kicks in afterburner. He aligns for a text book attack run from high altitude and gets fired at by the SA-11 in the coast line.
No chute, my wingman is dead (explosion in the left).
I then attack the only tank left with all I have at this point, the gun ...
Multiple passes, no results. In this image, a gentle slope made it impossible to put the tank into my sights. Low altitude gun runs suck ...
Another failed gun run with a shallow angle. I just can't pop up because of the SA-11 on my right. Flying over the target is not a good idea either.
I even tried changing the direction of the gun run. After some hits, the T-80 proved to be a tough nut to crack. Now he is getting too close to the front lines. With my guns dry, I RTB.
Landing at the forward base Sukhumi. Not a good day for our wing. A worse night for the troopers on the ground ...
Cheers,


Fantastic stuff, great reading. Not bad for a trench rat....! ;-)
ReplyDeleteI enjoy your blog, very interesting, I have to say. I'll be linking to it here: http://hogsofwar.wordpress.com
Cheers
Gillers
Nice writeup :)
ReplyDeleteThis is a fine example of the disruptive effect of air defences even when their actual kills are modest.
Some guys like to point to statistics like "1 in 25 or 50 SAMs fired in [insert favorite airwar era] ever hit anything" in order to dismiss ground defences in general and SAMs in particular.
It's easy to forget that air defences exist to protect defended assets, not to engage in shooting contests. Killing enemy air assets is certainly an effective way to do this, but not the only one.
In your example, the mere presence of advanced SAMs in the area greatly complicated the mission execution and allowed you to cause only modest attrition to the ground force. To a large extend, the enemy air defences accomplished their mission. (That would have been true even if your wingman had survived).
Keep up the thought-provoking work!
Nice AAR, I've been waiting for this one after seeing part 1.
ReplyDeleteThank you gents for your kind words.
ReplyDelete@Gillers: I'm thrilled that you liked it. I will link to your fantastic blog too. Thanks for the referral.
@Dimitris: That's a great remark. Indeed, without those SA-11s this would have been a cakewalk. Other thing that I wanted to point out is that all these virtual battlefields we fly on tend to make us believe that there will be a SEAD flight always available to help you out. Compare that to real wars, where your SA-11 woes would be just a drop in a bucket of threats.
@smith: Thanks. Sorry it took so long to complete this. Job obligations had me completely bogged down.
Cheers,
Impressive stuff here, I am hoping for more post from you soon. Thanks for sharing! Vancouver mortgage broker
ReplyDelete