This a continuation of
a previous entry. The topic is how this Combat Mission scenario took me out of a cozy tactical mind frame of just simple fire and maneuver.
 |
| Germans hiding in ambush within a French village. Come on! Like the hedgerows were not hard enough to take these out from ... |
The scenario: Bloody Dawn, by one of the great scenario designers Field Marshal Blucher
The game:
Combat Mission Battle for Normandy
Spoiler Alert! Do not read if you are still going to play this scenario against the computer.
The battle was fought and won, but the butcher's bill was way too high. In the map below, this is the scheme of fire, maneuver and tactical missions I used.
 |
| The battle as it was fought. I have a typo: the three infantry platoons in the map are not from company A but from company F. |
I don't run my virtual wars by checklists, but I should keep this list in mind while I make plans.
- Command and control
- Intelligence
- Maneuver Units
- Fire Support Units
- Mobility
- Combat Service Support
This is a list of all the types of combat services/functions and weapon systems in a battlefield. There is actually one more (air defense), but since in this scenario there is no air support for either side I will just omit it. A good battle plan should ensure that all of the above are available and working together towards the success of the mission.
In my opinion, besides remembering all these, the tricky part is putting them together into a working force. The hedgerow/bocage terrain of this scenario has one important effect on that because it produces isolation (i.e. two task groups can't support each other that easily). So, first bump in the road to success was to split the weapons company's assets in half between the right and left flank forces. There went command and control of the weapons company ...
Highlights of the 3rd Platoon's (Left Flank) Initial Assault Towards the Town's Entrance
 |
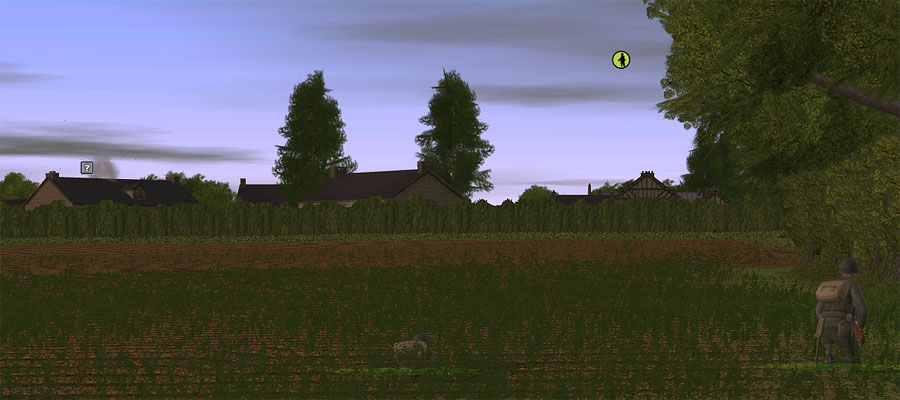
| Intelligence: two scouts from the 3rd Platoon were sent into the open field on the left flank. They spotted an enemy contact that was thoroughly suppressed with fire support units (next screen shot). This is a combat patrol mission that no scout in real life would accept (going through an open field in front of a likely enemy position), but I had no other choice. The main road leading into the town entrance offered cover and concealment but it was useless to completely observe the objective/enemy position. Fortunately, the scouts could report back on a likely enemy position (grey icon question mark in the background) without suffering any casualties. |
 |
| Fire support: the scouts shown above were not defenseless. A mortar and medium machine gun team provided fire support from a bend in the hedgerow line that had a direct LOS into the northern edge of the town entrance. |
 |
| Fire support and maneuver units working together: men from the 3rd Platoon make it into the open field in front of the town entrance objective. Note the tracers impacting in the suspected enemy position in the background. The smoke puffs are from mortar fire. |
 |
| Fire support units' main liability was their missions forcing them to stay put for relatively long periods of time. A mortar team (foreground) witnesses an enemy indirect fire round impacting right into the MMG team (explosion in the background). No survivors. |
 |
| Mobility: men from the 3rd Platoon gain a foothold in the town entrance objective after an engineer team blew a hole in the hedgerow line. Note the position of the breach, hidden from enemy observation and fire by a building. |
Highlights of the1st and 2nd Platoon's (Right Flank) Initial Attack Towards the Depth of the Enemy Defenses
 |
| Fire Support is not the exclusive realm of pure fire support units. 1st Platoon (right flank) found the first hedgerow line deserted and used it as a massive fire support position including a mortar and a machine gun team. |
 |
| Fire Support. An engineers team dashes forward, a few yards from a German defensive line that was completely suppressed by the units shown in the previous screenshot. Their objective is to open a breach in the hedgerow line at the left flank of the Germans. |
 |
| Mobility. A modest breach in the hedgerows, opened by the engineers, will be used to outflank the enemy position. |
 |
| SITREP. The German's left flank is now open. US support units (heavy and medium machine guns plus a mortar) oriented towards the center of the battlefield found German forces including an AT gun overlooking the town entrance objective. The German defensive line is now completely exposed! In the right side of the screenshot, 2nd Platoon is preparing to advance towards the intersection objective. |
 |
| Caught with their pants down and forced to fight on a reversed front, the Germans put an stubborn resistance. The firefight lasted longer than what I wished for. Even two heavy and one light US machine guns couldn't deal with the numerous German men. Without their respective HQ teams nearby (due to the massive force splitting of H Company's assets), the machine gunners' fire slacked in and out. Command and Control! My mortar team fired a few rounds at them but ran out of ammo. Ammunition didn't find its way to them for the rest of the battle (how do you replenish ammo for mortar teams anyway? Combat Service Support!). |
 |
| The great equalizer. Armored forces arrive at the battlefield and after negotiating the close terrain they help to terminate the Germans shown in the screenshot above. Because these tanks have not hedgerow cutters, they needed a breach in the hedgerows to accomplish this (mobility, again). The MG teams in the background now can get a respite. |
 |
| SITREP. The town entrance is clear but needs to be secured (note remnant German forces, grey icons, nearby). With the complete elimination of the German defensive line overlooking the town entrance (now occupied by US troops, backed up by a tank platoon in the open field), that's an easy task. The half-track mounted troops were committed in our left flank and unfortunately one half-track was lost to an AT gun shooting from the depth of the battlefield through a keyhole in the hedgerows. Note the 2nd Platoon's progress (far background near the intersection objective). |
More is coming, stay tuned.
Cheers,


No comments:
Post a Comment