If ordering the first shots of a meeting engagement that turned the tides of a war marred by indecisive battles doesn't move your inner generalissimo, nothing will.
Much has been written about the battle of Gettysburg and about the delaying action that the 1st US Cavalry Division fought during July 1st of 1863 under the command of the iconic General Buford. As usual, you are better off reading elsewhere about the American Civil War and the Battle of Gettysburg. If you are really into it, let me recommend you
David Pfanz's trilogy on Gettysburg. These books are the best tactical accounts of the battle.
Scourge of War is currently the only and best serious 3D tactical wargame about the Battle of Gettysburg. The past weekend I started playing the game's canned scenarios and I thought of sharing some of my misadventures here.
This scenario starts at 9:45 a.m. on July 1st 1863. In real life, after a couple of days of taunting between Confederate and Federal cavalry patrols, actions were just starting to shape into a battle. The Confederates started pushing towards Gettysburg with Maj. Gen. Heth's Division. The US Cav. Gen. Buford understood that the high ground around the McPherson's farm was crucial real estate to be held until the federal infantry arrived. In the game scenario, I'm playing as Gen. Buford and I am in command of the 1st US Cav. Division. My troopers are spread thin and for this battle I have only one brigade and a tiny 6-gun artillery battery.
 |
| Our mission: block the enemy forces attempting to seize McPherson's ridge until friendly infantry arrives. |
A quick glance at the battlefield above makes you wish you any other force than cavalry for this battle. The enemy will come to us walking down a slope, crossing the Willoughby run and then climbing up towards the McPherson's ridge. Is there a better kill zone than this? Tactical advantage is in the muzzle of the gun holder, though, and with the forces available, this is not going to be pretty.
For starters, there is the issue of weapons range. Back in the American Civil War, the troopers were armed with carbines that, despite being able to deliver higher firing rates than the infantry muskets, had shorter ranges and less stopping power. Second, there is the issue of limited numbers: cavalry formations were in the receiving end of the attrition equation. If there is an advantage that the US troopers have in this scenario, that is mobility.
Deviating my tactics from the ones used in the historical battle, and eager to catch the enemy infantry with their pants down while they cross the Willoughby run, I deploy my line of defense between the McPherson ridge and the run. I count on my troopers mobility to disengage and rapidly fall back towards the ridge. I even move my artillery battery forward.
I will go through my line of defense from left to right flank. Please refer to the above birds eye view of the battlefield to follow.
 |
| In the extreme left flank the 12th Illinois Cav. Regt. deployed within the McPherson's woods. This terrain is ideal for a cavalry-based defense as the woods provide cover to fire and concealment to withdraw. Note that the "8th New York Cavalry" text in the info panel actually refers to another unit I have clicked but moved away from to take this screenshot. |
 |
| The 8th Illinois and the 8th New York Cav. Regts.are deployed in the center along a worm fence, overwatching the Willoughby run. In a thin skirmish line, they cover from the Mc Pherson's woods to the right of the Chambersburg pike. |
 |
In the center, the only artillery available, deployed right in the Chambersburg pike. In the real battle, Gen. Buford ordered the commander of this battery (2nd Lt. Calef) to deploy his guns in a wide front so to deceive the enemy into thinking the federals have fielded a stronger force. The game shows this very well, and I had to scramble to gather 4 of the actual six guns available.
|
 |
| To the right of the railroad cut, the 3rd Indiana Cav. Regt.covers a wheat field. |
 |
| The 6th New York Cav. Regt. is the unit located at the right extreme of the federal line and also the one deployed closest to the enemy. The wheat field on this unit's left is the same wheat filed that the 3rd Indiana Cav. Regt. is covering (previous image). |
The enemy advanced in a wide front. For some strange reason, the Confederates pushing towards the center of my line made contact first.
 |
| The Confederates pushing towards the center of my defense line come under fire from the 8th New Yorkers. Despite the good shooting, the New Yorkers will have to show more than this to repel the enemy. |
Some five minutes later, the culminating point of battle: the Confederates on my right flank start moving towards the railroad cut. Right into the junction of my center (8th New York) and right flank (3rd Indiana)! I have no forces there!
 |
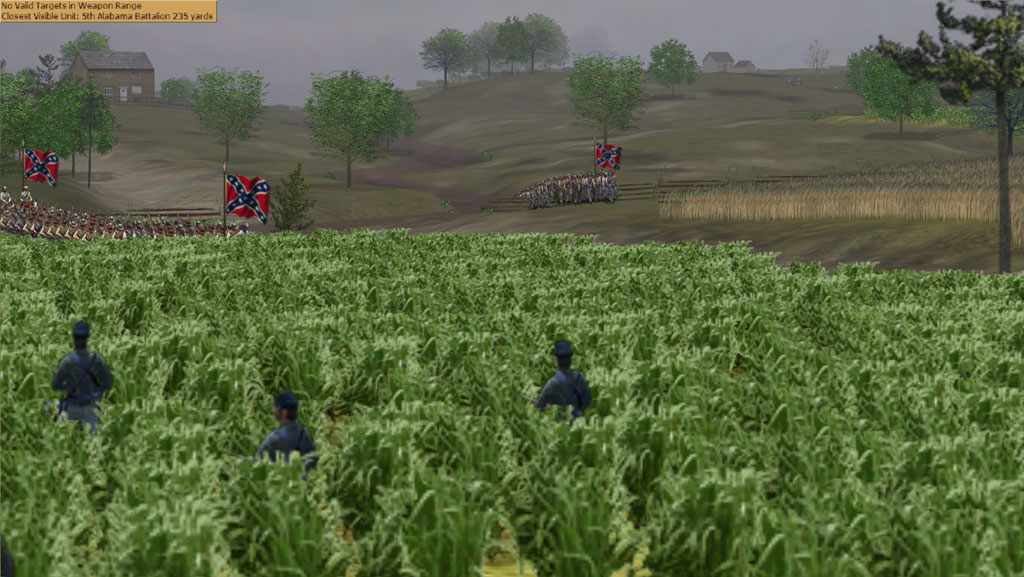
| Confederate forces advance towards the railroad cut (between the green corn field and the brown wheat field in the background). The men on the foreground are troopers from the 8th New York. |
 |
| A bird's eye view of the Confederate Brigade's move towards our weakest spot. |
Fortunately for my forces, the Confederates deploy in front of the 6th New York and 3rd Indiana Cav. Regts. instead of pushing through the railroad cut.
 |
| The Confederates deploy slightly in the right flank of the 6th New York. Although we are outnumbered, the deployment of the Confederates will buy us some time. |
 |
| Confederates (background) deploy in front of the 3rd Indiana. |
I knew it would happen, but I didn't know it was going to happen so fast. Cavalry skirmishers will skirmish, not defend to the last man. I thought the 3rd Indiana was going to hold for longer, but just after 5 minutes of shooting, they retreated.
 |
| The 3rd Indiana Cav. Regt. bugs out in all haste. |
While all this was happening, I had the 12th Illinois Cav. Regt. pulling out from the McPherson's woods (they haven't seen any action yet) and rushing towards the trouble spot at the railroad cut.
 |
| The 12th Illinois Cav. Regt. mounts up and move towards where they are needed best. The men on the right are dismounted troopers from the 6th New York, still standing in a skirmish line after all the fighting. |
The retreat of the 3rd Indiana Regt. had more devastating effect than what I anticipated, the center of my line (6th New York and Calef's battery) are now outflanked and under heavy pressure from the Confederates.
 |
| Our center has become our flank. Note the Confderates in the far background, now relieved by the retreat of the 3rd Indiana, moving to join the onslaught. |
 |
| The 12th Illinois arrives and tries to recover a semblance of a protected flank. |
And boy, if there was a well spirited unit in my command that was the 12th Illinois ... Not happy with shooting, they mounted up and charged the Confederates!
 |
| The 12th Illinois charges the enemy. |
In case you haven't noticed, the enemy is within shooting range of the McPherson's barn. They have reached the ridge and while they haven't secured it, we are officially not in control of the objective.
My center falls back, we are even thrown back to the reverse slope of the McPherson's ridge. The only option is to conduct some dis-functional counter-attacks to disrupt the enemy's deployment.
 |
| Friendly infantry is within sight. Note the routed troopers in the background. |
Most of my units are disrupted and I try to pull any trooper available back into the fight.
 |
| Troopers from the 8th Illinois fighting their way back to the McPherson's barn. |
 |
| A terrible price to pay for the McPherson ridge ... But it needs to be done. |
After some excruciating minutes, our infantry arrives. We are still enthralled in the fight, sabers waving slashes of Confederate blood up in the air, when the infantry men show up.
 |
| Friendly infantry (background) arrives and joins the fight. |
 |
| The arrival of our infantry shows up the real status of the enemy's morale. A Confederate regiment retreats from the McPherson's farm after a short fire exchange with Federal infantry troops. |
And this is how the scenario ended. I was awarded a major victory by the scoring system of the game, but we clearly failed the mission. We suffered 1042 casualties (out of 2805 men) and inflicted 1102 casualties to the enemy. We couldn't hold the ridge for our infantry and the poor souls will have to drive the enemy out of the objective.
My mistake was to push my troopers to fight as infantrymen ...
Cheers,


6 comments:
Thanks for a fine article.
Even though I couldn't get into Scourge of War myself I like reading about it. Tempts me to re-install Sid Meier's Gettysburg which I think is better and loved.
"And boy, if there was a well spirited unit in my command that was the 12th Illinois ... Not happy with shooting, they mounted up and charged the Confederates!"
Eh...?
And towards your final sentence, how should you have fought this battle, and is that because of how the game engine handles things?
Ey SM!
Thanks for your comment. Sid Meier's Gettysburg is a classic, that's for sure.
The 12th Illinois were dismounted when they made contact. They mounted up and charged the enemy even when cavalry charges come at a great cost for them. That's why I found this a bit amusing.
Cheers,
I am presently working my way through American Civil War Gettysburg by Talon Soft and have not heard of this game before (not a major Civil War buff, just found my game on a bargain bin rack in Target).
Very well written analysis of the action and at the very end the critique of the game telling you that victory was at hand versus the reality considering the amount of soldiers that were lost.
A great deal of worthwhile data for me!
JC - I see that Matrix Games just started putting this game out due to their new partnership with NorbSoftDev...in your opinion is this title worth $29.99 (digital download)?
Hi Ranger,
It is a fantastic game but also a bit demanding on hardware. Is there a demo you can try?
Cheers,
Post a Comment